Getting Started
This guide takes you from an empty account to a confirmed end-to-end delivery: you'll create an endpoint, send a real webhook to it, inspect what arrived, add a destination, and watch Webhookr forward the event.
If you just want the fastest possible test with curl, jump to the Fast Track.
:::note Prerequisites
- A Webhookr account (see Step 1).
- A terminal with
curl, or any tool that can send an HTTP request. - The base URL of your Webhookr ingest API. In these docs we use
https://api.webhookr.tech. :::
Step 1: Sign in
Open the Webhookr dashboard and sign in with your email and password.
https://app.webhookr.tech/login
Accounts are managed through Webhookr's identity provider (Firebase Authentication). If you don't have one yet, ask your workspace administrator to provision it.
A screenshot of the sign-in screen (/login) will be added here.
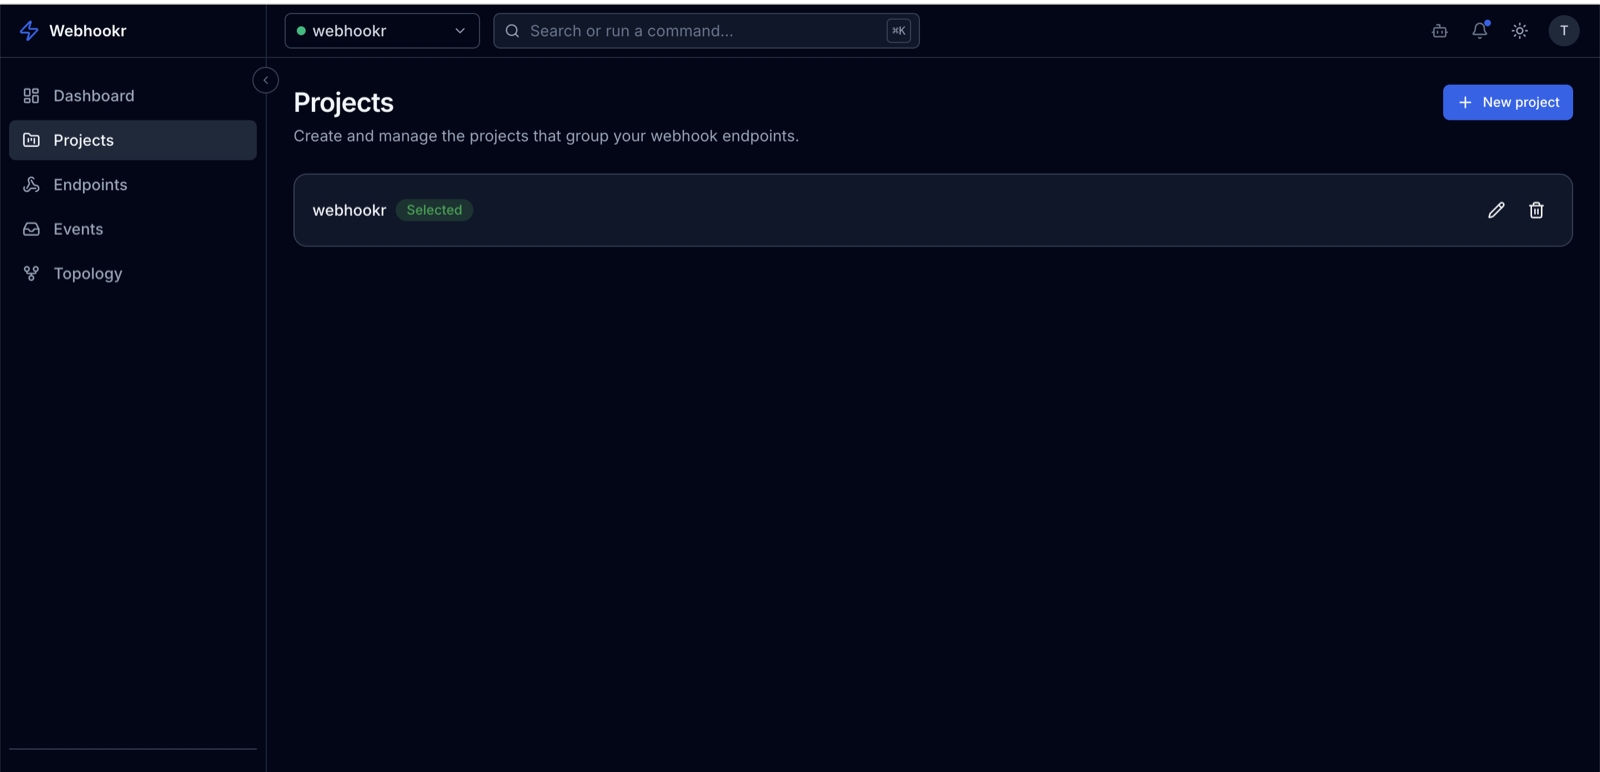
Step 2: Create or select a project
A project groups related endpoints — typically one project per application or environment (for example payments-prod and payments-staging).
- Go to Projects in the sidebar (
/dashboard/projects). - Click New project, give it a name, and create it.
- Select the project. The project switcher at the top of the dashboard keeps it active across pages.
Step 3: Create your first endpoint
An endpoint is the public URL that receives webhooks.
- Go to Endpoints (
/dashboard/endpoints) and click New endpoint. - Give it a name (for example
Stripe events). - Create it. Webhookr generates a unique slug for the endpoint automatically.
Your ingest URL is the API base URL plus /v1/ingest/ and the slug:
https://api.webhookr.tech/v1/ingest/<endpoint-slug>
New endpoints are active by default and immediately accept events.
Step 4: Send your first webhook event
Send a test request to your ingest URL. Webhookr accepts any HTTP method and any JSON body.
curl -i -X POST https://api.webhookr.tech/v1/ingest/<endpoint-slug> \
  -H "Content-Type: application/json" \
  -d '{"event":"hello.world","data":{"message":"My first webhook"}}'
A successful request returns 202 Accepted:
HTTP/1.1 202 Accepted
202 means Webhookr received and stored the event. Delivery to destinations happens asynchronously afterward.
You don't need a destination yet. Webhookr stores every event the moment it arrives, even if no destination is configured.
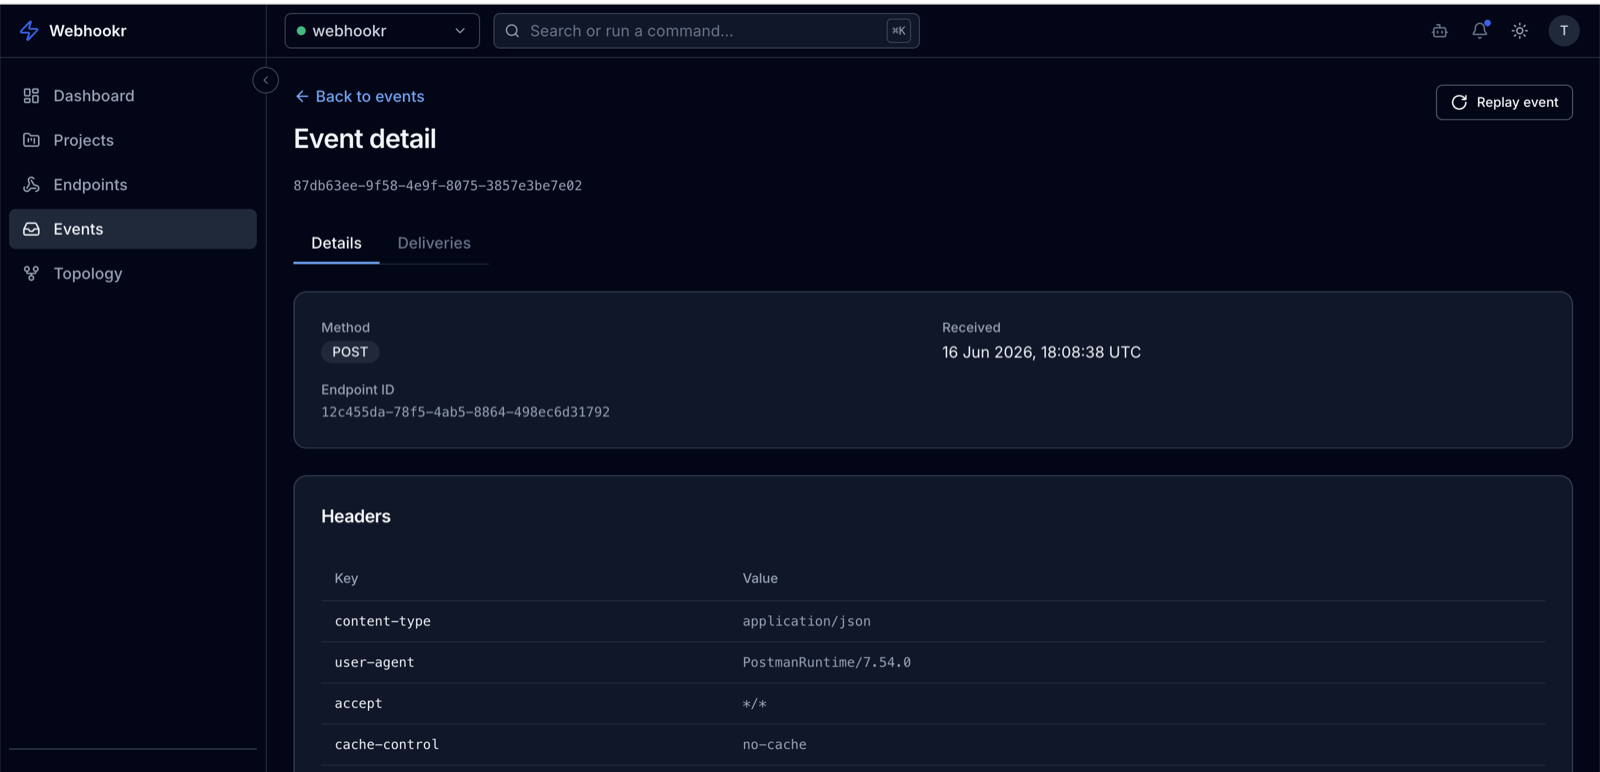
Step 5: Inspect the received event
- Go to Events (
/dashboard/events). - Select your endpoint to see its recent events.
- Open the event to inspect the full payload, headers, HTTP method, source IP, user agent, content type, and the time it was received.
This is the canonical record of what the provider actually sent.
Step 6: Add a destination
A destination is where Webhookr forwards events received by the endpoint.
- Open your endpoint and go to its Destinations.
- Click New destination.
- Set:
- Name — a label, e.g.
Order service. - URL — the HTTPS address that should receive the event.
- Method — defaults to
POST(also supportsGET,PUT,PATCH,DELETE). - Headers — optional custom headers (up to 20).
- Content-Type — defaults to
application/json. - Timeout — defaults to
30000ms (range1000–60000).
- Name — a label, e.g.
- Save. New destinations are enabled by default.
:::tip Need a test target? Use a public request bin such as https://webhook.site to get a URL you can paste as the destination, then watch deliveries land there. :::
Step 7: Confirm event delivery
With a destination in place, send another event (repeat Step 4). Webhookr creates one delivery per enabled destination.
- Open the event in Events.
- Look at its Deliveries. Each delivery shows a status:
PENDING— queued or in progress.SUCCESS— the destination responded with a 2xx status.FAILED— the destination errored, timed out, or returned a non-2xx status.
- Open a delivery to see the response status, response body, and duration.
If you used a request bin, you'll also see the forwarded request arrive there.
A screenshot of the delivery detail screen (/dashboard/events/<endpointId>/<eventId>/deliveries/<deliveryId>) will be added here.
You're done
You've completed the full loop: receive → inspect → deliver → confirm.
Next steps:
- Explore the Product Walkthrough for the full UI.
- Replay a stored event — see Replay.
- Visualize event flow on the Topology graph.
- Manage everything as code with Terraform.